Setting Up a Free Personal Website with an Admin Panel
TLDR: This guide outlines the steps to create a personal website with an admin panel for free, using specific technologies and services. By following this article and reviewing the linked GitHub repository, a website can be launched with minimal coding.
Final Appearance: https://safagayret.com
GitHub Repository: https://github.com/gayret/safagayretcom-nextjs

Technologies and Services Utilized
Airtable.com

The database will be accessible via a web browser using a free Airtable account, allowing management of the content directly through the mobile app. https://airtable.com

Content management is made easy and mobile-friendly.
Airtable features a user-friendly interface, making it simple to set up the database and tables without further elaboration. Focus will be on displaying the data on the website.
NextJS
For a modern, secure, and clean website that is easily found on search engines, NextJS serves as an excellent framework. Installation can be done by following the steps in the official documentation. https://nextjs.org
GitHub
A repository will be created on GitHub for code hosting, which will play a crucial role in the deployment process.
Vercel
Vercel offers a platform to publish the website for free, providing hosting services in a straightforward manner, ideal for users of all ages.

To begin, click the Add New… button, select “Project,” and choose the relevant GitHub repository. This setup automates deployment every time a commit is made to the selected branch.
- Custom Domain
Vercel provides a free subdomain (safagayret.vercel.app). To use a custom domain such as safagayret.com, visit the project settings and configure the custom domain options.

Let’s Write Some Code
With an understanding of the required technologies and services, and after making the necessary configurations, it’s time to write some code.
When creating a new NextJS project, modify the page.js file to serve as the homepage.
// app -> page.js

import Image from 'next/image';
import ProfilePicture from './assets/img/profile.webp';

export default function Home() {
  return (
    <section className="bordered image-and-text">
      <Image src={ProfilePicture} alt="profile picture" />
      <h1>Safa Gayret</h1>
      <small>Software Engineer</small>
      <p>JavaScript, VueJS, ReactJS</p>
    </section>
  );
}
The homepage consists of just 13 lines of code. Feel free to customize it further.
No database fetching is required on the homepage; however, it will be necessary for the “My Articles on Software” page.
Now is the time to create the Airtable Instance.
To utilize Airtable, install the [Airtable JavaScript Client](https://github.com/Airtable/airtable.js) dependency.
npm i airtable
Under the app directory (name optional), create a folder named lib and add a file called airtable.js with the following 27 lines of code.
// app -> lib -> airtable.js

import Airtable from 'airtable';

const fetchAirtableTable = async tableName => {
  const base = new Airtable({ apiKey: process.env.AIRTABLE_API_KEY }).base(process.env.AIRTABLE_BASE);

  const records = await base(tableName).select({ view: 'Grid view' }).all();

  const groupedRecords = records.reduce((accum, current) => {
    const { date, text, link } = current.fields;

    if (!accum[date]) {
      accum[date] = { date, link, texts: [] };
    }

    accum[date].texts.push(text);
    return accum;
  }, {});

  return Object.values(groupedRecords).reverse();
};

export { fetchAirtableTable };
The values for process.env.AIRTABLE_API_KEY and process.env.AIRTABLE_BASE can be obtained from Airtable.
The reduce operation used to group records by date may not be necessary for every project, and it can be adjusted accordingly.
The Airtable Instance is now ready, enabling the creation of the “My Articles on Software” page.
Create a folder named software-articles within the app directory, and then add a file called page.js.
// app -> software-articles -> page.js

import TimeLineCard from '../components/TimeLineCard/timeLineCard';
import { fetchAirtableTable } from '../lib/airtable';

export const revalidate = 3600;

export default async function SoftwareArticles() {
  const data = await fetchAirtableTable('softwareArticles');

  return (
    <div className="bordered">
      <h1>My Articles on Software</h1>
      {data.map(time => (
        <TimeLineCard key={time.texts} texts={time.texts} date={time.date} link={time.link} />
      ))}
    </div>
  );
}
Note: NextJS has incorporated a caching mechanism in its new App Router update, which previously required optional configuration with the Pages Router. The revalidate value determines how often the cache should be refreshed, with the input being in seconds. For instance, setting 3600 will fetch new data from the database every hour. Adjust this according to the frequency of content updates.
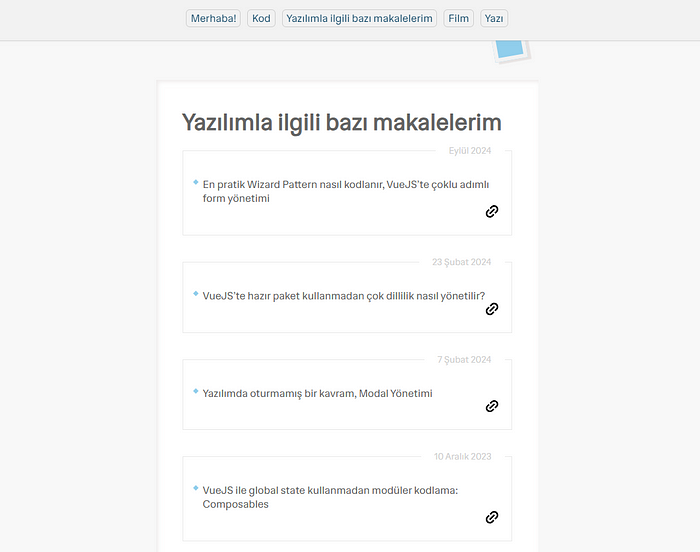
Finally, the data is formatted using the TimeLineCard component. This component can be redesigned according to individual preferences.
// app -> components -> TimeLineCard -> timeLineCard.js

import Image from 'next/image';
import linkSvg from '../../assets/img/link.svg';
import Link from 'next/link';

export default function TimeLineCard({ texts, date, link }) {
  return (
    <div className="time-line-card">
      <span className="time-line-card-date">{date}</span>
      {texts.map(t => (
        <p key={t} className="time-line-card-text">
          {t}
        </p>
      ))}
      <div className="time-line-footer">
        {link && (
          <Link href={link} target="_blank">
            <Image src={linkSvg} alt="link" width={15} />
          </Link>
        )}
      </div>
    </div>
  );
}
With the Airtable application installed on a mobile device, management of website content is now possible. Decisions can be made on which content should be dynamic and which should remain static.
If a domain name is already owned, a completely free website that meets all modern standards has been created.
Enjoy using the new website!
Ref: Safa Gayret - Medium